贡献代码
欢迎加入 MMagic 社区,我们致力于打造新一代人工智能内容生成(AIGC)工具箱,我们欢迎任何类型的贡献,包括但不限于
修复错误
修复代码实现错误的步骤如下:
如果提交的代码改动较大,建议先提交 issue,并正确描述 issue 的现象、原因和复现方式,讨论后确认修复方案。
修复错误并补充相应的单元测试,提交拉取请求。
新增功能或组件
如果新功能或模块涉及较大的代码改动,建议先提交 issue,确认功能的必要性。
实现新增功能并添单元测试,提交拉取请求。
文档补充
修复文档可以直接提交拉取请求
添加文档或将文档翻译成其他语言步骤如下
提交 issue,确认添加文档的必要性。
添加文档,提交拉取请求。
拉取请求工作流
如果你对拉取请求不了解,没关系,接下来的内容将会从零开始,一步一步地指引你如何创建一个拉取请求。如果你想深入了解拉取请求的开发模式,可以参考 github 官方文档
1. 复刻仓库
当你第一次提交拉取请求时,先复刻 OpenMMLab 原代码库,点击 GitHub 页面右上角的 Fork 按钮,复刻后的代码库将会出现在你的 GitHub 个人主页下。

将代码克隆到本地
git clone git@github.com:{username}/mmagic.git
添加原代码库为上游代码库
git remote add upstream git@github.com:open-mmlab/mmagic
检查 remote 是否添加成功,在终端输入 git remote -v
origin	git@github.com:{username}/mmagic.git (fetch)
origin	git@github.com:{username}/mmagic.git (push)
upstream	git@github.com:open-mmlab/mmagic (fetch)
upstream	git@github.com:open-mmlab/mmagic (push)
备注
这里对 origin 和 upstream 进行一个简单的介绍,当我们使用 git clone 来克隆代码时,会默认创建一个 origin 的 remote,它指向我们克隆的代码库地址,而 upstream 则是我们自己添加的,用来指向原始代码库地址。当然如果你不喜欢他叫 upstream,也可以自己修改,比如叫 open-mmlab。我们通常向 origin 提交代码(即 fork 下来的远程仓库),然后向 upstream 提交一个 pull request。如果提交的代码和最新的代码发生冲突,再从 upstream 拉取最新的代码,和本地分支解决冲突,再提交到 origin。
2. 配置 pre-commit
在本地开发环境中,我们使用 pre-commit 来检查代码风格,以确保代码风格的统一。在提交代码,需要先安装 pre-commit(需要在 mmagic 目录下执行):
pip install -U pre-commit
pre-commit install
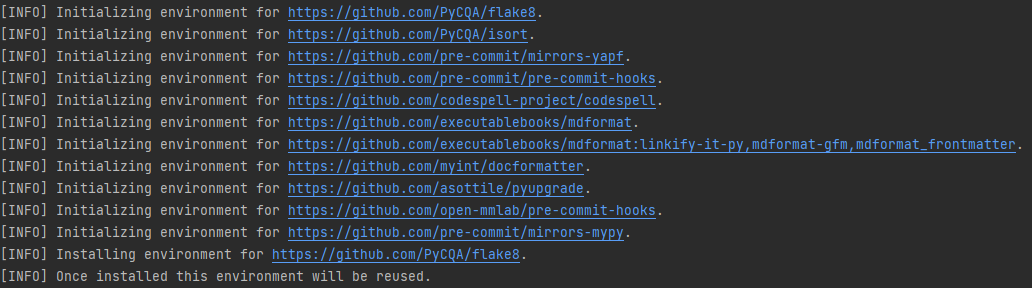
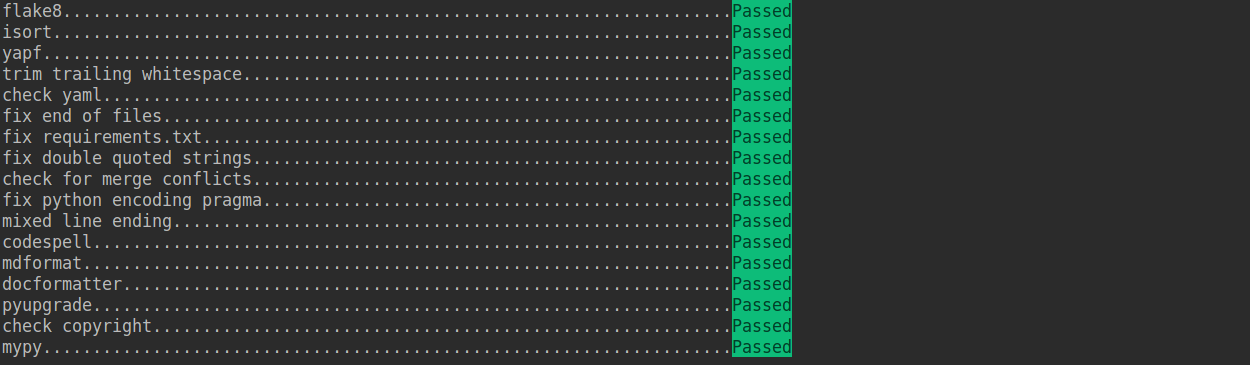
检查 pre-commit 是否配置成功,并安装 .pre-commit-config.yaml 中的钩子:
pre-commit run --all-files
备注
如果你是中国用户,由于网络原因,可能会出现安装失败的情况,这时可以使用国内源
pre-commit install -c .pre-commit-config-zh-cn.yaml
pre-commit run –all-files -c .pre-commit-config-zh-cn.yaml
如果安装过程被中断,可以重复执行 pre-commit run ... 继续安装。
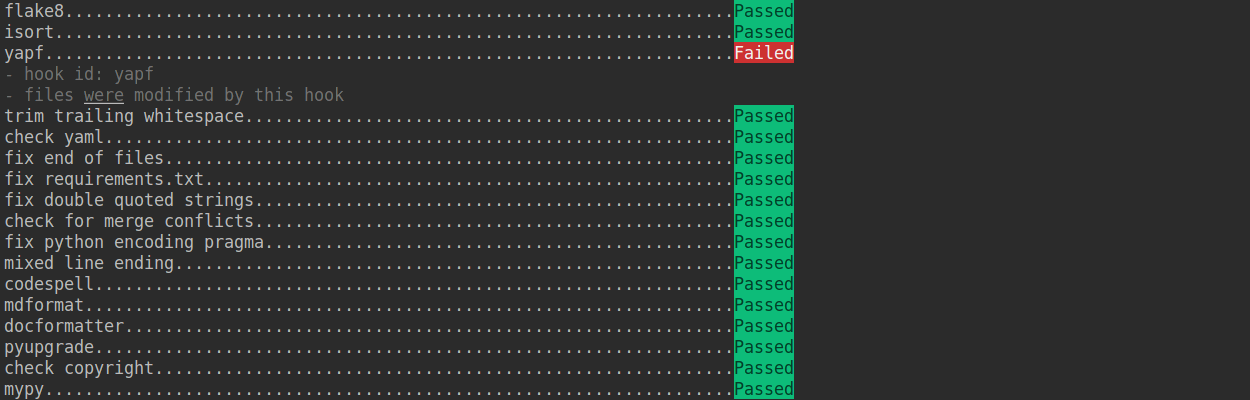
如果提交的代码不符合代码风格规范,pre-commit 会发出警告,并自动修复部分错误。
如果我们想临时绕开 pre-commit 的检查提交一次代码,可以在 git commit 时加上 --no-verify(需要保证最后推送至远程仓库的代码能够通过 pre-commit 检查)。
git commit -m "xxx" --no-verify
3. 创建开发分支
安装完 pre-commit 之后,我们需要基于 main 创建开发分支,建议的分支命名规则为 username/pr_name。
git checkout -b yhc/refactor_contributing_doc
在后续的开发中,如果本地仓库的 main 分支落后于 upstream 的 main 分支,我们需要先拉取 upstream 的代码进行同步,再执行上面的命令
git pull upstream main
4. 提交代码并在本地通过单元测试
mmagic 引入了 mypy 来做静态类型检查,以增加代码的鲁棒性。因此我们在提交代码时,需要补充 Type Hints。具体规则可以参考教程。
提交的代码同样需要通过单元测试
# 通过全量单元测试
pytest tests

# 我们需要保证提交的代码能够通过修改模块的单元测试,以 runner 为例
pytest tests/test_runner/test_runner.py
如果你由于缺少依赖无法运行修改模块的单元测试,可以参考指引-单元测试
如果修改/添加了文档,参考指引确认文档渲染正常。
5. 推送代码到远程
代码通过单元测试和 pre-commit 检查后,将代码推送到远程仓库,如果是第一次推送,可以在 git push 后加上 -u 参数以关联远程分支
git push -u origin {branch_name}
这样下次就可以直接使用 git push 命令推送代码了,而无需指定分支和远程仓库。
6. 提交拉取请求(PR)
(1) 在 GitHub 的 Pull request 界面创建拉取请求

(2) 根据指引修改 PR 描述,以便于其他开发者更好地理解你的修改

描述规范详见拉取请求规范
注意事项
(a) PR 描述应该包含修改理由、修改内容以及修改后带来的影响,并关联相关 Issue(具体方式见文档)
(b) 如果是第一次为 OpenMMLab 做贡献,需要签署 CLA

(c) 检查提交的 PR 是否通过 CI(集成测试)

mmagic 会在不同的平台(Linux、Window、Mac),基于不同版本的 Python、PyTorch、CUDA 对提交的代码进行单元测试,以保证代码的正确性,如果有任何一个没有通过,我们可点击上图中的 Details 来查看具体的测试信息,以便于我们修改代码。
(3) 如果 PR 通过了 CI,那么就可以等待其他开发者的 review,并根据 reviewer 的意见,修改代码,并重复 4-5 步骤,直到 reviewer 同意合入 PR。

所有 reviewer 同意合入 PR 后,我们会尽快将 PR 合并到主分支。
7. 解决冲突
随着时间的推移,我们的代码库会不断更新,这时候,如果你的 PR 与主分支存在冲突,你需要解决冲突,解决冲突的方式有两种:
git fetch --all --prune
git rebase upstream/main
或者
git fetch --all --prune
git merge upstream/main
如果你非常善于处理冲突,那么可以使用 rebase 的方式来解决冲突,因为这能够保证你的 commit log 的整洁。如果你不太熟悉 rebase 的使用,那么可以使用 merge 的方式来解决冲突。
指引
单元测试
在提交修复代码错误或新增特性的拉取请求时,我们应该尽可能的让单元测试覆盖所有提交的代码,计算单元测试覆盖率的方法如下
python -m coverage run -m pytest /path/to/test_file
python -m coverage html
# check file in htmlcov/index.html
文档渲染
在提交修复代码错误或新增特性的拉取请求时,可能会需要修改/新增模块的 docstring。我们需要确认渲染后的文档样式是正确的。 本地生成渲染后的文档的方法如下
pip install -r requirements/docs.txt
cd docs/zh_cn/
# or docs/en
make html
# check file in ./docs/zh_cn/_build/html/index.html
代码风格
Python
PEP8 作为 OpenMMLab 算法库首选的代码规范,我们使用以下工具检查和格式化代码
flake8: Python 官方发布的代码规范检查工具,是多个检查工具的封装
isort: 自动调整模块导入顺序的工具
yapf: Google 发布的代码规范检查工具
codespell: 检查单词拼写是否有误
mdformat: 检查 markdown 文件的工具
docformatter: 格式化 docstring 的工具
yapf 和 isort 的配置可以在 setup.cfg 找到
通过配置 pre-commit hook ,我们可以在提交代码时自动检查和格式化 flake8、yapf、isort、trailing whitespaces、markdown files,修复 end-of-files、double-quoted-strings、python-encoding-pragma、mixed-line-ending,调整 requirments.txt 的包顺序。
pre-commit 钩子的配置可以在 .pre-commit-config 找到。
pre-commit 具体的安装使用方式见拉取请求。
更具体的规范请参考 OpenMMLab 代码规范。
C++ and CUDA
C++ 和 CUDA 的代码规范遵从 Google C++ Style Guide
拉取请求规范
使用 pre-commit hook,尽量减少代码风格相关问题
一个
拉取请求对应一个短期分支粒度要细,一个
拉取请求只做一件事情,避免超大的拉取请求Bad:实现 Faster R-CNN
Acceptable:给 Faster R-CNN 添加一个 box head
Good:给 box head 增加一个参数来支持自定义的 conv 层数
每次 Commit 时需要提供清晰且有意义 commit 信息
提供清晰且有意义的
拉取请求描述标题写明白任务名称,一般格式:[Prefix] Short description of the pull request (Suffix)
prefix: 新增功能 [Feature], 修 bug [Fix], 文档相关 [Docs], 开发中 [WIP] (暂时不会被review)
描述里介绍
拉取请求的主要修改内容,结果,以及对其他部分的影响, 参考拉取请求模板关联相关的
议题(issue) 和其他拉取请求
如果引入了其他三方库,或借鉴了三方库的代码,请确认他们的许可证和 mmagic 兼容,并在借鉴的代码上补充
This code is inspired from http://
代码规范
代码规范标准
PEP 8 —— Python 官方代码规范
Python 官方的代码风格指南,包含了以下几个方面的内容:
代码布局,介绍了 Python 中空行、断行以及导入相关的代码风格规范。比如一个常见的问题:当我的代码较长,无法在一行写下时,何处可以断行?
表达式,介绍了 Python 中表达式空格相关的一些风格规范。
尾随逗号相关的规范。当列表较长,无法一行写下而写成如下逐行列表时,推荐在末项后加逗号,从而便于追加选项、版本控制等。
# Correct:
FILES = ['setup.cfg', 'tox.ini']
# Correct:
FILES = [
    'setup.cfg',
    'tox.ini',
]
# Wrong:
FILES = ['setup.cfg', 'tox.ini',]
# Wrong:
FILES = [
    'setup.cfg',
    'tox.ini'
]
命名相关规范、注释相关规范、类型注解相关规范,我们将在后续章节中做详细介绍。
“A style guide is about consistency. Consistency with this style guide is important. Consistency within a project is more important. Consistency within one module or function is the most important.” PEP 8 – Style Guide for Python Code
备注
PEP 8 的代码规范并不是绝对的,项目内的一致性要优先于 PEP 8 的规范。OpenMMLab 各个项目都在 setup.cfg 设定了一些代码规范的设置,请遵照这些设置。一个例子是在 PEP 8 中有如下一个例子:
# Correct:
hypot2 = x*x + y*y
# Wrong:
hypot2 = x * x + y * y
这一规范是为了指示不同优先级,但 OpenMMLab 的设置中通常没有启用 yapf 的 ARITHMETIC_PRECEDENCE_INDICATION 选项,因而格式规范工具不会按照推荐样式格式化,以设置为准。
Google 开源项目风格指南
Google 使用的编程风格指南,包括了 Python 相关的章节。相较于 PEP 8,该指南提供了更为详尽的代码指南。该指南包括了语言规范和风格规范两个部分。
其中,语言规范对 Python 中很多语言特性进行了优缺点的分析,并给出了使用指导意见,如异常、Lambda 表达式、列表推导式、metaclass 等。
风格规范的内容与 PEP 8 较为接近,大部分约定建立在 PEP 8 的基础上,也有一些更为详细的约定,如函数长度、TODO 注释、文件与 socket 对象的访问等。
推荐将该指南作为参考进行开发,但不必严格遵照,一来该指南存在一些 Python 2 兼容需求,例如指南中要求所有无基类的类应当显式地继承 Object, 而在仅使用 Python 3 的环境中,这一要求是不必要的,依本项目中的惯例即可。二来 OpenMMLab 的项目作为框架级的开源软件,不必对一些高级技巧过于避讳,尤其是 MMCV。但尝试使用这些技巧前应当认真考虑是否真的有必要,并寻求其他开发人员的广泛评估。
另外需要注意的一处规范是关于包的导入,在该指南中,要求导入本地包时必须使用路径全称,且导入的每一个模块都应当单独成行,通常这是不必要的,而且也不符合目前项目的开发惯例,此处进行如下约定:
# Correct
from mmagic.cnn.bricks import (Conv2d, build_norm_layer, DropPath, MaxPool2d,
                             Linear)
from ..utils import ext_loader

# Wrong
from mmagic.cnn.bricks import Conv2d, build_norm_layer, DropPath, MaxPool2d, \
                            Linear  # 使用括号进行连接,而不是反斜杠
from ...utils import is_str  # 最多向上回溯一层,过多的回溯容易导致结构混乱
OpenMMLab 项目使用 pre-commit 工具自动格式化代码,详情见贡献代码。
命名规范
命名规范的重要性
优秀的命名是良好代码可读的基础。基础的命名规范对各类变量的命名做了要求,使读者可以方便地根据代码名了解变量是一个类 / 局部变量 / 全局变量等。而优秀的命名则需要代码作者对于变量的功能有清晰的认识,以及良好的表达能力,从而使读者根据名称就能了解其含义,甚至帮助了解该段代码的功能。
基础命名规范
| 类型 | 公有 | 私有 |
|---|---|---|
| 模块 | lower_with_under | _lower_with_under |
| 包 | lower_with_under | |
| 类 | CapWords | _CapWords |
| 异常 | CapWordsError | |
| 函数(方法) | lower_with_under | _lower_with_under |
| 函数 / 方法参数 | lower_with_under | |
| 全局 / 类内常量 | CAPS_WITH_UNDER | _CAPS_WITH_UNDER |
| 全局 / 类内变量 | lower_with_under | _lower_with_under |
| 变量 | lower_with_under | _lower_with_under |
| 局部变量 | lower_with_under |
注意:
尽量避免变量名与保留字冲突,特殊情况下如不可避免,可使用一个后置下划线,如 class_
尽量不要使用过于简单的命名,除了约定俗成的循环变量 i,文件变量 f,错误变量 e 等。
不会被用到的变量可以命名为 _,逻辑检查器会将其忽略。
命名技巧
良好的变量命名需要保证三点:
含义准确,没有歧义
长短适中
前后统一
# Wrong
class Masks(metaclass=ABCMeta):  # 命名无法表现基类;Instance or Semantic?
    pass

# Correct
class BaseInstanceMasks(metaclass=ABCMeta):
    pass

# Wrong,不同地方含义相同的变量尽量用统一的命名
def __init__(self, inplanes, planes):
    pass

def __init__(self, in_channels, out_channels):
    pass
常见的函数命名方法:
动宾命名法:crop_img, init_weights
动宾倒置命名法:imread, bbox_flip
注意函数命名与参数的顺序,保证主语在前,符合语言习惯:
check_keys_exist(key, container)
check_keys_contain(container, key)
注意避免非常规或统一约定的缩写,如 nb -> num_blocks,in_nc -> in_channels
docstring 规范
为什么要写 docstring
docstring 是对一个类、一个函数功能与 API 接口的详细描述,有两个功能,一是帮助其他开发者了解代码功能,方便 debug 和复用代码;二是在 Readthedocs 文档中自动生成相关的 API reference 文档,帮助不了解源代码的社区用户使用相关功能。
如何写 docstring
与注释不同,一份规范的 docstring 有着严格的格式要求,以便于 Python 解释器以及 sphinx 进行文档解析,详细的 docstring 约定参见 PEP 257。此处以例子的形式介绍各种文档的标准格式,参考格式为 Google 风格。
模块文档
代码风格规范推荐为每一个模块(即 Python 文件)编写一个 docstring,但目前 OpenMMLab 项目大部分没有此类 docstring,因此不做硬性要求。
"""A one line summary of the module or program, terminated by a period.

Leave one blank line. The rest of this docstring should contain an
overall description of the module or program. Optionally, it may also
contain a brief description of exported classes and functions and/or usage
examples.

Typical usage example:

foo = ClassFoo()
bar = foo.FunctionBar()
"""
类文档
类文档是我们最常需要编写的,此处,按照 OpenMMLab 的惯例,我们使用了与 Google 风格不同的写法。如下例所示,文档中没有使用 Attributes 描述类属性,而是使用 Args 描述 init 函数的参数。
在 Args 中,遵照
parameter (type): Description.的格式,描述每一个参数类型和功能。其中,多种类型可使用(float or str)的写法,可以为 None 的参数可以写为(int, optional)。class BaseRunner(metaclass=ABCMeta): """The base class of Runner, a training helper for PyTorch. All subclasses should implement the following APIs: - ``run()`` - ``train()`` - ``val()`` - ``save_checkpoint()`` Args: model (:obj:`torch.nn.Module`): The model to be run. batch_processor (callable, optional): A callable method that process a data batch. The interface of this method should be ``batch_processor(model, data, train_mode) -> dict``. Defaults to None. optimizer (dict or :obj:`torch.optim.Optimizer`, optional): It can be either an optimizer (in most cases) or a dict of optimizers (in models that requires more than one optimizer, e.g., GAN). Defaults to None. work_dir (str, optional): The working directory to save checkpoints and logs. Defaults to None. logger (:obj:`logging.Logger`): Logger used during training. Defaults to None. (The default value is just for backward compatibility) meta (dict, optional): A dict records some import information such as environment info and seed, which will be logged in logger hook. Defaults to None. max_epochs (int, optional): Total training epochs. Defaults to None. max_iters (int, optional): Total training iterations. Defaults to None. """ def __init__(self, model, batch_processor=None, optimizer=None, work_dir=None, logger=None, meta=None, max_iters=None, max_epochs=None): ...
另外,在一些算法实现的主体类中,建议加入原论文的链接;如果参考了其他开源代码的实现,则应加入 modified from,而如果是直接复制了其他代码库的实现,则应加入 copied from ,并注意源码的 License。如有必要,也可以通过 .. math:: 来加入数学公式
# 参考实现
# This func is modified from `detectron2
# <https://github.com/facebookresearch/detectron2/blob/ffff8acc35ea88ad1cb1806ab0f00b4c1c5dbfd9/detectron2/structures/masks.py#L387>`_.

# 复制代码
# This code was copied from the `ubelt
# library<https://github.com/Erotemic/ubelt>`_.

# 引用论文 & 添加公式
class LabelSmoothLoss(nn.Module):
    r"""Initializer for the label smoothed cross entropy loss.

    Refers to `Rethinking the Inception Architecture for Computer Vision
    <https://arxiv.org/abs/1512.00567>`_.

    This decreases gap between output scores and encourages generalization.
    Labels provided to forward can be one-hot like vectors (NxC) or class
    indices (Nx1).
    And this accepts linear combination of one-hot like labels from mixup or
    cutmix except multi-label task.

    Args:
        label_smooth_val (float): The degree of label smoothing.
        num_classes (int, optional): Number of classes. Defaults to None.
        mode (str): Refers to notes, Options are "original", "classy_vision",
            "multi_label". Defaults to "classy_vision".
        reduction (str): The method used to reduce the loss.
            Options are "none", "mean" and "sum". Defaults to 'mean'.
        loss_weight (float):  Weight of the loss. Defaults to 1.0.

    Note:
        if the ``mode`` is "original", this will use the same label smooth
        method as the original paper as:

        .. math::
            (1-\epsilon)\delta_{k, y} + \frac{\epsilon}{K}

        where :math:`\epsilon` is the ``label_smooth_val``, :math:`K` is
        the ``num_classes`` and :math:`\delta_{k,y}` is Dirac delta,
        which equals 1 for k=y and 0 otherwise.

        if the ``mode`` is "classy_vision", this will use the same label
        smooth method as the `facebookresearch/ClassyVision
        <https://github.com/facebookresearch/ClassyVision/blob/main/classy_vision/losses/label_smoothing_loss.py>`_ repo as:

        .. math::
            \frac{\delta_{k, y} + \epsilon/K}{1+\epsilon}

        if the ``mode`` is "multi_label", this will accept labels from
        multi-label task and smoothing them as:

        .. math::
            (1-2\epsilon)\delta_{k, y} + \epsilon
备注
注意 ``here``、`here`、”here” 三种引号功能是不同。
在 reStructured 语法中,``here`` 表示一段代码;`here` 表示斜体;”here” 无特殊含义,一般可用来表示字符串。其中 `here` 的用法与 Markdown 中不同,需要多加留意。 另外还有 :obj:`type` 这种更规范的表示类的写法,但鉴于长度,不做特别要求,一般仅用于表示非常用类型。
方法(函数)文档
函数文档与类文档的结构基本一致,但需要加入返回值文档。对于较为复杂的函数和类,可以使用 Examples 字段加入示例;如果需要对参数加入一些较长的备注,可以加入 Note 字段进行说明。
对于使用较为复杂的类或函数,比起看大段大段的说明文字和参数文档,添加合适的示例更能帮助用户迅速了解其用法。需要注意的是,这些示例最好是能够直接在 Python 交互式环境中运行的,并给出一些相对应的结果。如果存在多个示例,可以使用注释简单说明每段示例,也能起到分隔作用。
def import_modules_from_strings(imports, allow_failed_imports=False):
    """Import modules from the given list of strings.

    Args:
        imports (list | str | None): The given module names to be imported.
        allow_failed_imports (bool): If True, the failed imports will return
            None. Otherwise, an ImportError is raise. Defaults to False.

    Returns:
        List[module] | module | None: The imported modules.
        All these three lines in docstring will be compiled into the same
        line in readthedocs.

    Examples:
        >>> osp, sys = import_modules_from_strings(
        ...     ['os.path', 'sys'])
        >>> import os.path as osp_
        >>> import sys as sys_
        >>> assert osp == osp_
        >>> assert sys == sys_
    """
    ...
如果函数接口在某个版本发生了变化,需要在 docstring 中加入相关的说明,必要时添加 Note 或者 Warning 进行说明,例如:
class CheckpointHook(Hook):
    """Save checkpoints periodically.

    Args:
        out_dir (str, optional): The root directory to save checkpoints. If
            not specified, ``runner.work_dir`` will be used by default. If
            specified, the ``out_dir`` will be the concatenation of
            ``out_dir`` and the last level directory of ``runner.work_dir``.
            Defaults to None. `Changed in version 1.3.15.`
        file_client_args (dict, optional): Arguments to instantiate a
            FileClient. See :class:`mmagic.fileio.FileClient` for details.
            Defaults to None. `New in version 1.3.15.`

    Warning:
        Before v1.3.15, the ``out_dir`` argument indicates the path where the
        checkpoint is stored. However, in v1.3.15 and later, ``out_dir``
        indicates the root directory and the final path to save checkpoint is
        the concatenation of out_dir and the last level directory of
        ``runner.work_dir``. Suppose the value of ``out_dir`` is
        "/path/of/A" and the value of ``runner.work_dir`` is "/path/of/B",
        then the final path will be "/path/of/A/B".
如果参数或返回值里带有需要展开描述字段的 dict,则应该采用如下格式:
def func(x):
    r"""
    Args:
        x (None): A dict with 2 keys, ``padded_targets``, and ``targets``.

            - ``targets`` (list[Tensor]): A list of tensors.
              Each tensor has the shape of :math:`(T_i)`. Each
              element is the index of a character.
            - ``padded_targets`` (Tensor): A tensor of shape :math:`(N)`.
              Each item is the length of a word.

    Returns:
        dict: A dict with 2 keys, ``padded_targets``, and ``targets``.

        - ``targets`` (list[Tensor]): A list of tensors.
          Each tensor has the shape of :math:`(T_i)`. Each
          element is the index of a character.
        - ``padded_targets`` (Tensor): A tensor of shape :math:`(N)`.
          Each item is the length of a word.
    """
    return x
重要
为了生成 readthedocs 文档,文档的编写需要按照 ReStructrued 文档格式,否则会产生文档渲染错误,在提交 PR 前,最好生成并预览一下文档效果。 语法规范参考:
注释规范
为什么要写注释
对于一个开源项目,团队合作以及社区之间的合作是必不可少的,因而尤其要重视合理的注释。不写注释的代码,很有可能过几个月自己也难以理解,造成额外的阅读和修改成本。
如何写注释
最需要写注释的是代码中那些技巧性的部分。如果你在下次代码审查的时候必须解释一下,那么你应该现在就给它写注释。对于复杂的操作,应该在其操作开始前写上若干行注释。对于不是一目了然的代码,应在其行尾添加注释。 —— Google 开源项目风格指南
# We use a weighted dictionary search to find out where i is in
# the array. We extrapolate position based on the largest num
# in the array and the array size and then do binary search to
# get the exact number.
if i & (i-1) == 0:  # True if i is 0 or a power of 2.
为了提高可读性, 注释应该至少离开代码2个空格. 另一方面, 绝不要描述代码. 假设阅读代码的人比你更懂Python, 他只是不知道你的代码要做什么. —— Google 开源项目风格指南
# Wrong:
# Now go through the b array and make sure whenever i occurs
# the next element is i+1

# Wrong:
if i & (i-1) == 0:  # True if i bitwise and i-1 is 0.
在注释中,可以使用 Markdown 语法,因为开发人员通常熟悉 Markdown 语法,这样可以便于交流理解,如可使用单反引号表示代码和变量(注意不要和 docstring 中的 ReStructured 语法混淆)
# `_reversed_padding_repeated_twice` is the padding to be passed to
# `F.pad` if needed (e.g., for non-zero padding types that are
# implemented as two ops: padding + conv). `F.pad` accepts paddings in
# reverse order than the dimension.
self._reversed_padding_repeated_twice = _reverse_repeat_tuple(self.padding, 2)
注释示例
出自
mmcv/utils/registry.py,对于较为复杂的逻辑结构,通过注释,明确了优先级关系。# self.build_func will be set with the following priority: # 1. build_func # 2. parent.build_func # 3. build_from_cfg if build_func is None: if parent is not None: self.build_func = parent.build_func else: self.build_func = build_from_cfg else: self.build_func = build_func
出自
mmcv/runner/checkpoint.py,对于 bug 修复中的一些特殊处理,可以附带相关的 issue 链接,帮助其他人了解 bug 背景。def _save_ckpt(checkpoint, file): # The 1.6 release of PyTorch switched torch.save to use a new # zipfile-based file format. It will cause RuntimeError when a # checkpoint was saved in high version (PyTorch version>=1.6.0) but # loaded in low version (PyTorch version<1.6.0). More details at # https://github.com/open-mmlab/mmpose/issues/904 if digit_version(TORCH_VERSION) >= digit_version('1.6.0'): torch.save(checkpoint, file, _use_new_zipfile_serialization=False) else: torch.save(checkpoint, file)
类型注解
为什么要写类型注解
类型注解是对函数中变量的类型做限定或提示,为代码的安全性提供保障、增强代码的可读性、避免出现类型相关的错误。 Python 没有对类型做强制限制,类型注解只起到一个提示作用,通常你的 IDE 会解析这些类型注解,然后在你调用相关代码时对类型做提示。另外也有类型注解检查工具,这些工具会根据类型注解,对代码中可能出现的问题进行检查,减少 bug 的出现。 需要注意的是,通常我们不需要注释模块中的所有函数:
公共的 API 需要注释
在代码的安全性,清晰性和灵活性上进行权衡是否注释
对于容易出现类型相关的错误的代码进行注释
难以理解的代码请进行注释
若代码中的类型已经稳定,可以进行注释. 对于一份成熟的代码,多数情况下,即使注释了所有的函数,也不会丧失太多的灵活性.
如何写类型注解
函数 / 方法类型注解,通常不对 self 和 cls 注释。
from typing import Optional, List, Tuple

# 全部位于一行
def my_method(self, first_var: int) -> int:
    pass

# 另起一行
def my_method(
        self, first_var: int,
        second_var: float) -> Tuple[MyLongType1, MyLongType1, MyLongType1]:
    pass

# 单独成行(具体的应用场合与行宽有关,建议结合 yapf 自动化格式使用)
def my_method(
    self, first_var: int, second_var: float
) -> Tuple[MyLongType1, MyLongType1, MyLongType1]:
    pass

# 引用尚未被定义的类型
class MyClass:
    def __init__(self,
                 stack: List["MyClass"]) -> None:
        pass
注:类型注解中的类型可以是 Python 内置类型,也可以是自定义类,还可以使用 Python 提供的 wrapper 类对类型注解进行装饰,一些常见的注解如下:
# 数值类型
from numbers import Number

# 可选类型,指参数可以为 None
from typing import Optional
def foo(var: Optional[int] = None):
    pass

# 联合类型,指同时接受多种类型
from typing import Union
def foo(var: Union[float, str]):
    pass

from typing import Sequence  # 序列类型
from typing import Iterable  # 可迭代类型
from typing import Any  # 任意类型
from typing import Callable  # 可调用类型

from typing import List, Dict  # 列表和字典的泛型类型
from typing import Tuple  # 元组的特殊格式
# 虽然在 Python 3.9 中,list, tuple 和 dict 本身已支持泛型,但为了支持之前的版本
# 我们在进行类型注解时还是需要使用 List, Tuple, Dict 类型
# 另外,在对参数类型进行注解时,尽量使用 Sequence & Iterable & Mapping
# List, Tuple, Dict 主要用于返回值类型注解
# 参见 https://docs.python.org/3/library/typing.html#typing.List
变量类型注解,一般用于难以直接推断其类型时
# Recommend: 带类型注解的赋值
a: Foo = SomeUndecoratedFunction()
a: List[int]: [1, 2, 3]         # List 只支持单一类型泛型,可使用 Union
b: Tuple[int, int] = (1, 2)     # 长度固定为 2
c: Tuple[int, ...] = (1, 2, 3)  # 变长
d: Dict[str, int] = {'a': 1, 'b': 2}

# Not Recommend:行尾类型注释
# 虽然这种方式被写在了 Google 开源指南中,但这是一种为了支持 Python 2.7 版本
# 而补充的注释方式,鉴于我们只支持 Python 3, 为了风格统一,不推荐使用这种方式。
a = SomeUndecoratedFunction()  # type: Foo
a = [1, 2, 3]  # type: List[int]
b = (1, 2, 3)  # type: Tuple[int, ...]
c = (1, "2", 3.5)  # type: Tuple[int, Text, float]
泛型
上文中我们知道,typing 中提供了 list 和 dict 的泛型类型,那么我们自己是否可以定义类似的泛型呢?
from typing import TypeVar, Generic

KT = TypeVar('KT')
VT = TypeVar('VT')

class Mapping(Generic[KT, VT]):
    def __init__(self, data: Dict[KT, VT]):
        self._data = data

    def __getitem__(self, key: KT) -> VT:
        return self._data[key]
使用上述方法,我们定义了一个拥有泛型能力的映射类,实际用法如下:
mapping = Mapping[str, float]({'a': 0.5})
value: float = example['a']
另外,我们也可以利用 TypeVar 在函数签名中指定联动的多个类型:
from typing import TypeVar, List

T = TypeVar('T')  # Can be anything
A = TypeVar('A', str, bytes)  # Must be str or bytes


def repeat(x: T, n: int) -> List[T]:
    """Return a list containing n references to x."""
    return [x]*n


def longest(x: A, y: A) -> A:
    """Return the longest of two strings."""
    return x if len(x) >= len(y) else y
更多关于类型注解的写法请参考 typing。
类型注解检查工具
mypy 是一个 Python 静态类型检查工具。根据你的类型注解,mypy 会检查传参、赋值等操作是否符合类型注解,从而避免可能出现的 bug。
例如如下的一个 Python 脚本文件 test.py:
def foo(var: int) -> float:
    return float(var)

a: str = foo('2.0')
b: int = foo('3.0')  # type: ignore
运行 mypy test.py 可以得到如下检查结果,分别指出了第 4 行在函数调用和返回值赋值两处类型错误。而第 5 行同样存在两个类型错误,由于使用了 type: ignore 而被忽略了,只有部分特殊情况可能需要此类忽略。
test.py:4: error: Incompatible types in assignment (expression has type "float", variable has type "int")
test.py:4: error: Argument 1 to "foo" has incompatible type "str"; expected "int"
Found 2 errors in 1 file (checked 1 source file)